One more list of photo albums
OK, y'all, I *really* thought it would be easier than it has been for me to write a daily travel blog/journal entry.... (note to self...
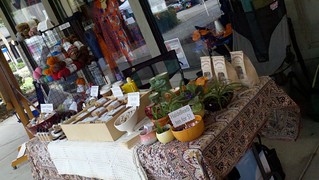
Here’s what I usually do a few days before every craft show… print out new signs for small items that I don’t want to sticker individually. Why do I do it each time? (1) They get banged up during transportation back from the show. (2) I might change the price (like when I figured out it was easier for MATH REASONS to just include tax on each item and round up or down to the nearest .50). (3) I might change which small items they are. (4) I might change my signage type. You can kind of see my signs in this picture from a couple of years ago –
I wanted something better, and let me tell you that a search on Pinterest for craft show displays did nothing but make me resolved not to have a booth that people were afraid to touch in case they knocked everything over like dominoes. HOWEVER, one thing I kept seeing (so, thank you, Pinterest, I think) were chalkboard signs. And like every Maker, ever, I thought… “I can so do that.”
And here’s how I did, in six super-easy steps.
STEP ONE: BUY WHAT YOU NEED
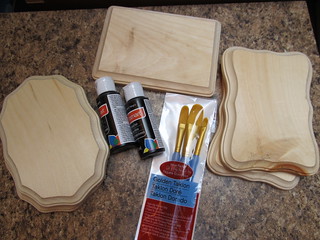
I thought I might need four, so I bought five. I bought chalkboard paint (ridiculously hard to find in Michaels, mostly because it’s hidden deeply in with the acrylic paint). They do make a spray paint, but as I am a painter, this seemed more natural. I got a pack instead of a single brush (I’m a painter, I can always use an extra brush). I got more chalkboard paint than I thought I’d need, just in case, and also it was a whopping $1.25 and I was willing to shell that out to hedge my bets against a cat knocking over the paint bottle (it’s happened before) or my own clumsy self (it’s happened before).
PRO TIP: if you are getting chalkboard paint, and things to make chalkboards with, you may also want to consider getting chalk. JUST SAYIN’. Also, if using paint and brushes, you may want eyeball the paint brush and make sure you’re not getting one too big for your jar – or have a small cup on hand into which you can pour the paint (see also: it’s happened before).
STEP TWO: SAND THE EDGES
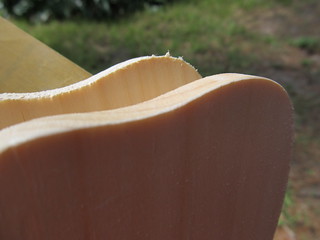
Unless you like splinters (I do not). Or your customers like splinters (mine do not). That Poor Man does a lot of woodworking, so I just snagged some of his sandpaper. If you don’t have sandpaper lying about, you may want to pick some up.
STEP THREE: PUT ON ONE COAT OF PAINT
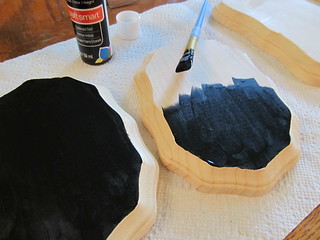
Put all the paint in the same direction. It may sound silly but it does assure an even layer when you come back around and put on the second coat. Let it dry; my directions said about an hour, which is what I gave it.
STEP FOUR: PUT ON A SECOND COAT OF PAINT
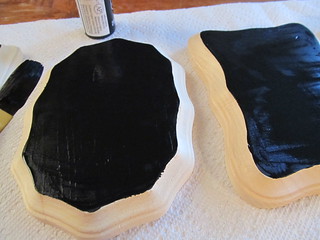
Put on this coat going in a perpendicular direction to your first coat. If you went right-to-left with your first coat, you want to go up-and-down with your second.
Let this dry for 24 hours.
STEP FIVE: RUB SOME CHALK OVER IT

This is where, if you forgot to get chalk FOR THE CHALKBOARDS YOU ARE MAKING, you may need to run out to a store. Ahem.
STEP SIX: WIPE OFF THE CHALK
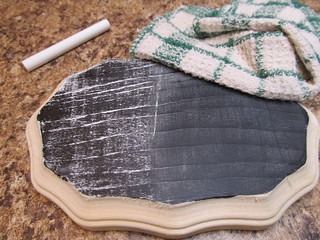
Seriously, y’all, it’s that easy.
I also bought some fancy chalkboard paint pens (not shown, sorry, picked up later on a second frustrated trip back to Micheals. I got this brand but my gawd, not in those colors.
I wrote on one of the signs before leaving for the craft show, just in case the pens didn’t work; they worked fine, so I left the others to do once we got to the show (I wasn’t sure if the chalkboard pen would rub off during transport — they did fine).
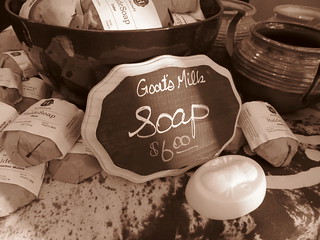
And, there ya go! Easy peasy lemon squeezy. The initial purchase of everything ran about $15, with tax. The chalk I ran out and got was about $1. The chalkboard pens were the most expensive; I wound up getting two packs of four, because each pack had one color I wanted (sigh). Those were about $12 each. I definitely have enough paint and chalk left over that I could do about 30 more signs. Overall, I consider this project Rated E for Easy, Rated RI for Relatively Inexpensive, and Rated SAMCDT for Seriously, A Monkey Could Do This.
Such a wonderful time! Thanks for sharing!
just WOW! too much! I'll dedicate a weekend to Ire when you get back. Have fun!
OH MY GOD I wonder if it's too late in life for a career change?! That would be so fun!
Brilliant! I'd watch the hell out of a PBS show of you just traveling and rambling, just sayin'.
I'm sure Molly is thrilled at all the people touching her boobs. Goodness... Those parks are so lovely. And that…


WOW; i have some monkeys on hand who ask me about once a week…can we paint ? …this plan would cover that !
Next time consider putting a layer (or two) of magnetic paint under the chalkboard paint. This will allow you to attach updates, business cards, or just very pretty magnets to your signs. It’s what I did to the main support pillar in the middle of my house – so now it hosts important papers (like my PT exercises) along with my variable to-do list (in chalk).
Part of me wants to see the look on my (eventual) home-buyer, when they realize just *this* wall is magnetic …